Module 3: Creating and managing tests in Katalon Studio
Creating and managing tests in Katalon Studio
Recording Test Cases in Katalon Studio
Recording Test Cases in Katalon Studio
Recording test cases in Katalon Studio is a straightforward process that enables testers, including those with minimal scripting knowledge, to quickly create automated tests for web applications. The recording feature captures the user’s actions on the web application and generates automated scripts that can be replayed to perform testing. This is especially useful for creating initial test scripts that can later be refined and extended. Here’s how to record test cases in Katalon Studio:
Steps to Record a Test Case:
Launch Katalon Studio:
- Open Katalon Studio and select or create a new project.
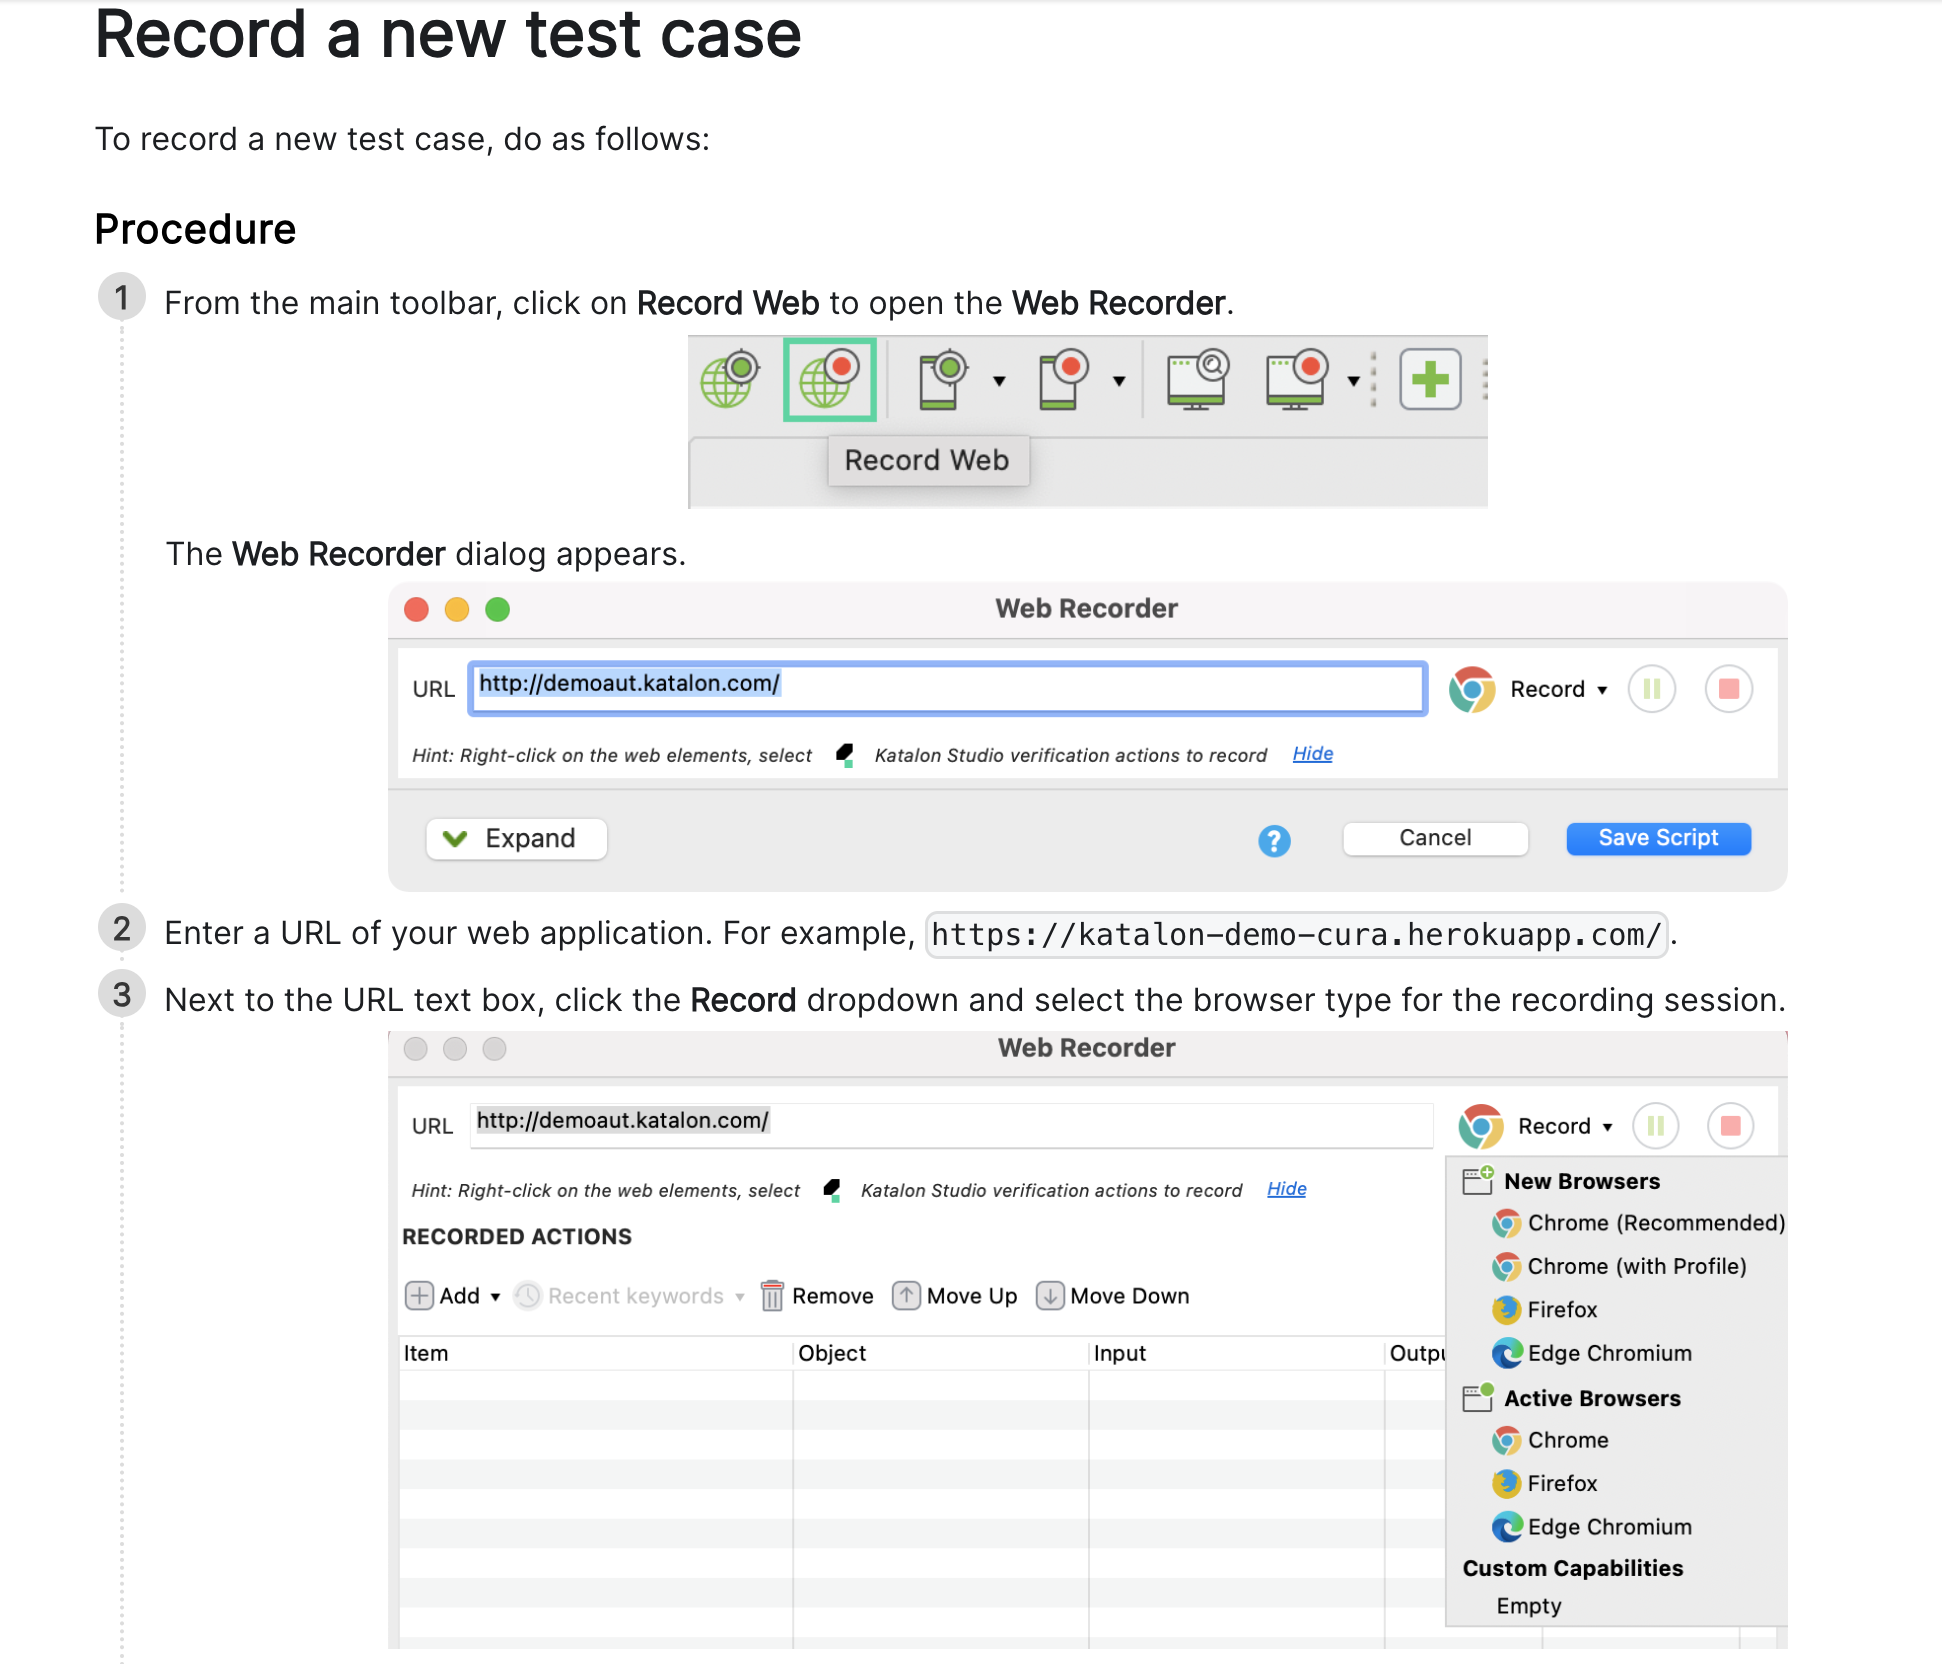
- Open Web Recorder:
- Navigate to the main toolbar.
- Choose the “Record Web” option from the “New Test Case” dropdown menu. This will open the Web Recorder dialog.
- Configure the Recording Settings:
- In the “URL” field, enter the web application URL you wish to test.
- Select the preferred browser for recording (e.g., Chrome, Firefox, Edge) by clicking on the corresponding browser icon.
- You may also configure advanced settings if necessary, such as browser driver executables or proxy settings, by clicking on “Browser Settings”
Start Recording:
- Click the “Start” button. Katalon Studio will launch the selected browser and navigate to the specified URL.
- Perform the actions you want to test on the web application. Katalon Studio will record these actions in real-time. This includes clicks, text input, selections, and navigations.
- Add Verifications (Optional):
- While recording, you can add verification points to validate the state of the web application. For example, you might verify if a certain text is present or if a button is enabled.
- To add a verification, right-click on the element you wish to verify and select the appropriate verification from the context menu.
- Stop Recording:
- Once you have completed the actions for your test case, click the “Stop” button on the Katalon Studio Recorder toolbar.
- The recorded actions will be displayed in the Recorder Dialog.
- Save the Test Case:
- Review the recorded actions and verifications. You can edit, delete, or rearrange steps as necessary.
- Provide a name for your test case and click “OK” to save it to your project.
- The test case will be saved with the recorded steps, and you can now view and edit it within Katalon Studio’s test case editor.
- Playback the Test Case:
- To verify the recorded test case, you can playback the steps. Open the test case and click the “Run” button.
- Select the browser you wish to use for the test execution. Katalon Studio will automatically execute the test case steps in the selected browser.
Challenge 1 : Recording the account creation: first login to your salesforce dev account
- Setup and Configuration:
- Start with a fresh Katalon Studio project.
- Configure your project settings to connect with your Salesforce developer account, including browser settings and any required extensions for Salesforce Aura components.
- Record the Login Process:
- Use Katalon’s Web Recorder to capture the login process to Salesforce.
- Enhance the recorded login script by adding validation checks to ensure the login was successful before proceeding.
- Record the Search Operation in Salesforce Aura:
- Record the steps to perform a search operation within Salesforce Aura.
- Implement parameterization to make the search query dynamic, allowing for reusability of the test case with different search inputs.
- Navigate and Create a Manual Account:
- Record the process of navigating to the “Accounts” section and initiating the creation of a new account.
- Instead of only recording, enhance this part by manually scripting parts of the process, incorporating custom waits or checks to ensure the UI has loaded completely before performing actions.