Module 3: AI-Powered-Testing-Tools
AI-Powered-Testing-Tools
Sample test creation using Testrigor
Setting Up a New Test Suite in TestRigor
This guide will walk you through creating a new test suite in TestRigor to automate interactions with a web application.
Step 1: Log in to TestRigor
- Go to TestRigor.
- Log in with your credentials.
Step 2: Create a New Test Suite
- From the dashboard, click on New Test Suite.
Step 3: Fill in Test Suite Details
-
Test Suite Name:
Enter a name for your test suite, e.g.,Check checkboxes for practiceautomatedtesting website. -
Type of Testing:
Choose the testing type, such as Desktop Web Testing. -
URL to run tests on:
Enter the URL where your test cases will run.
Example:https://practiceautomatedtesting.com -
Username and Password (Optional):
If the site requires login, provide the username and password here. -
OS:
Select the operating system for running the tests.
Options: Ubuntu for the free version. -
Browser:
Select the browser for testing, such as Chrome. -
Number of Test Cases to Generate Using AI (Optional):
Specify how many test cases to auto-generate.
Limited to 3 for the free version. -
Description of the Application for AI Test Generation:
Provide a brief description of the test flow.
Example:From my homepage, I want to navigate to web elements page. From there, I want to click on the checkboxes page. When I am on the checkboxes page, I want to test the checkboxes if I get a happy or unhappy smiley back.the input field should look something like this
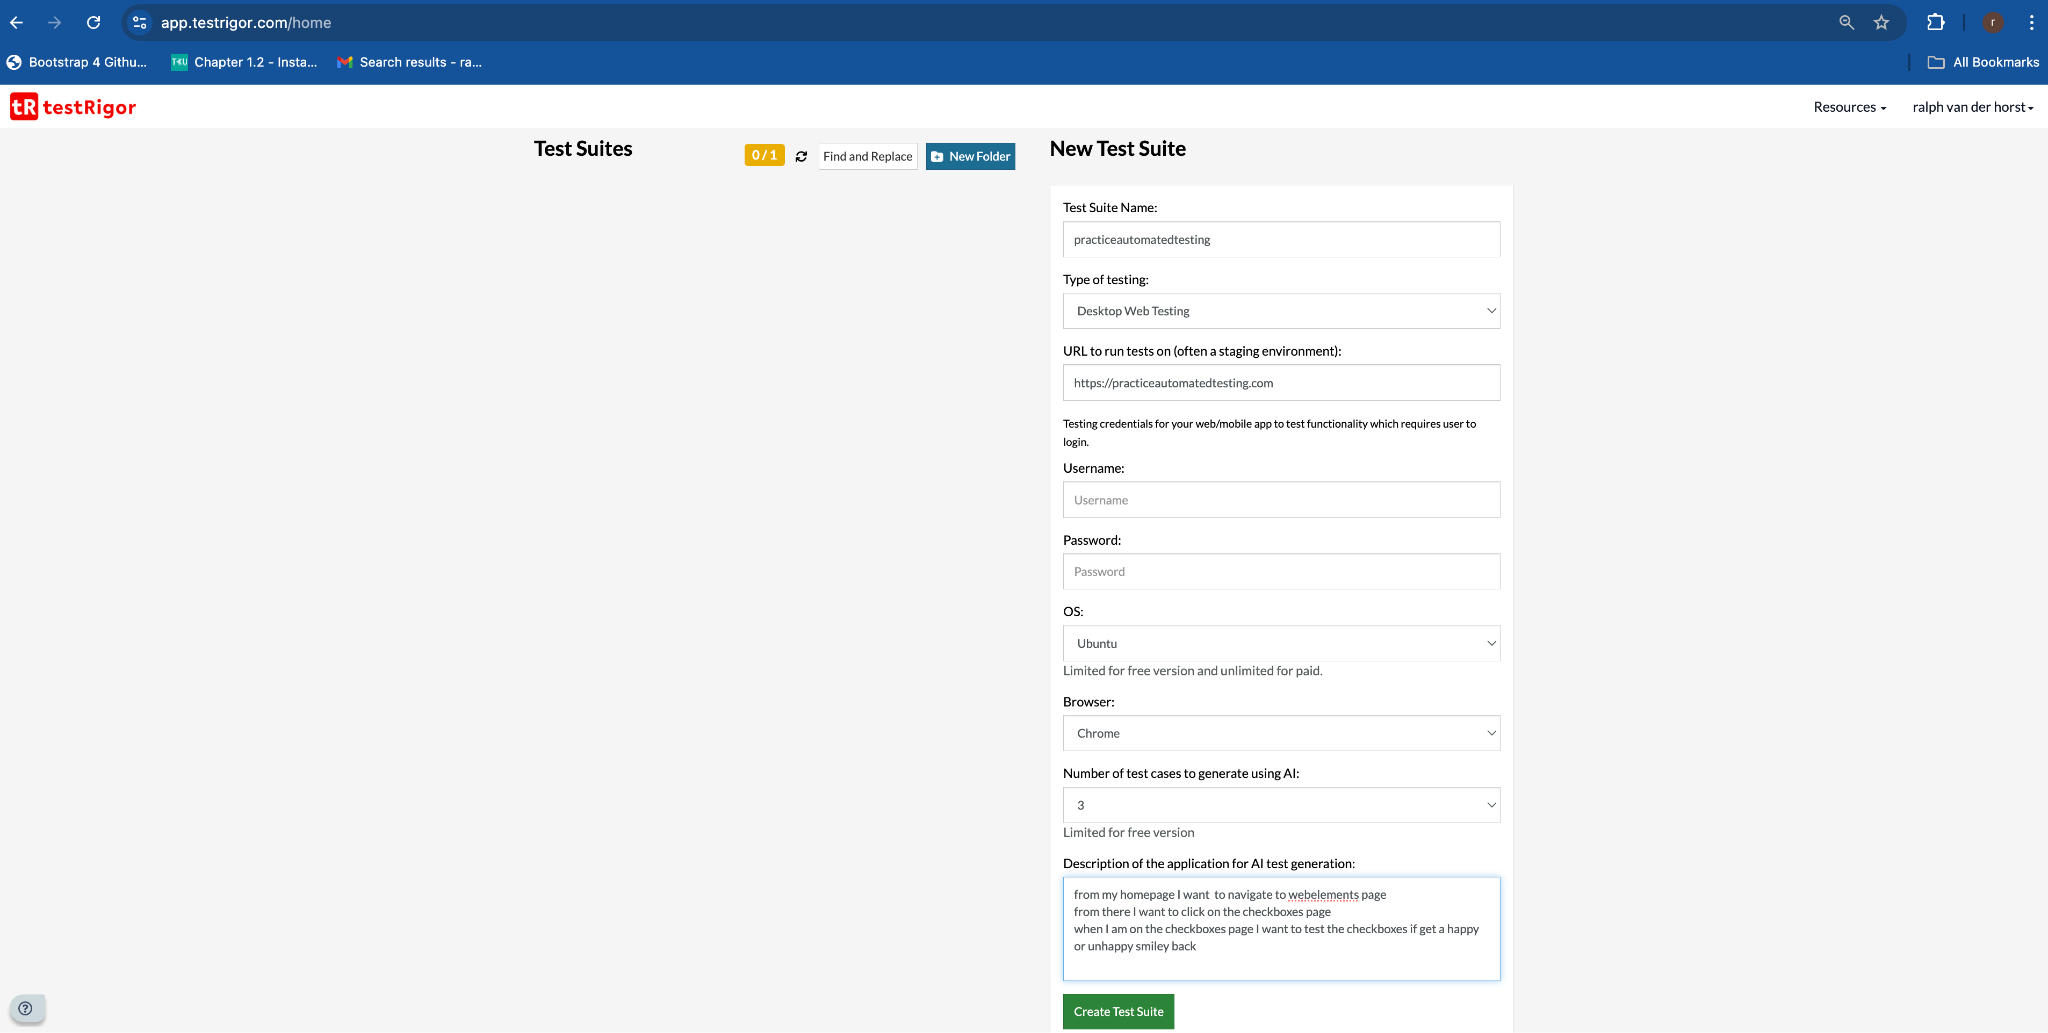
Step 4: Create Test Suite
- Once all fields are completed, click Create Test Suite.
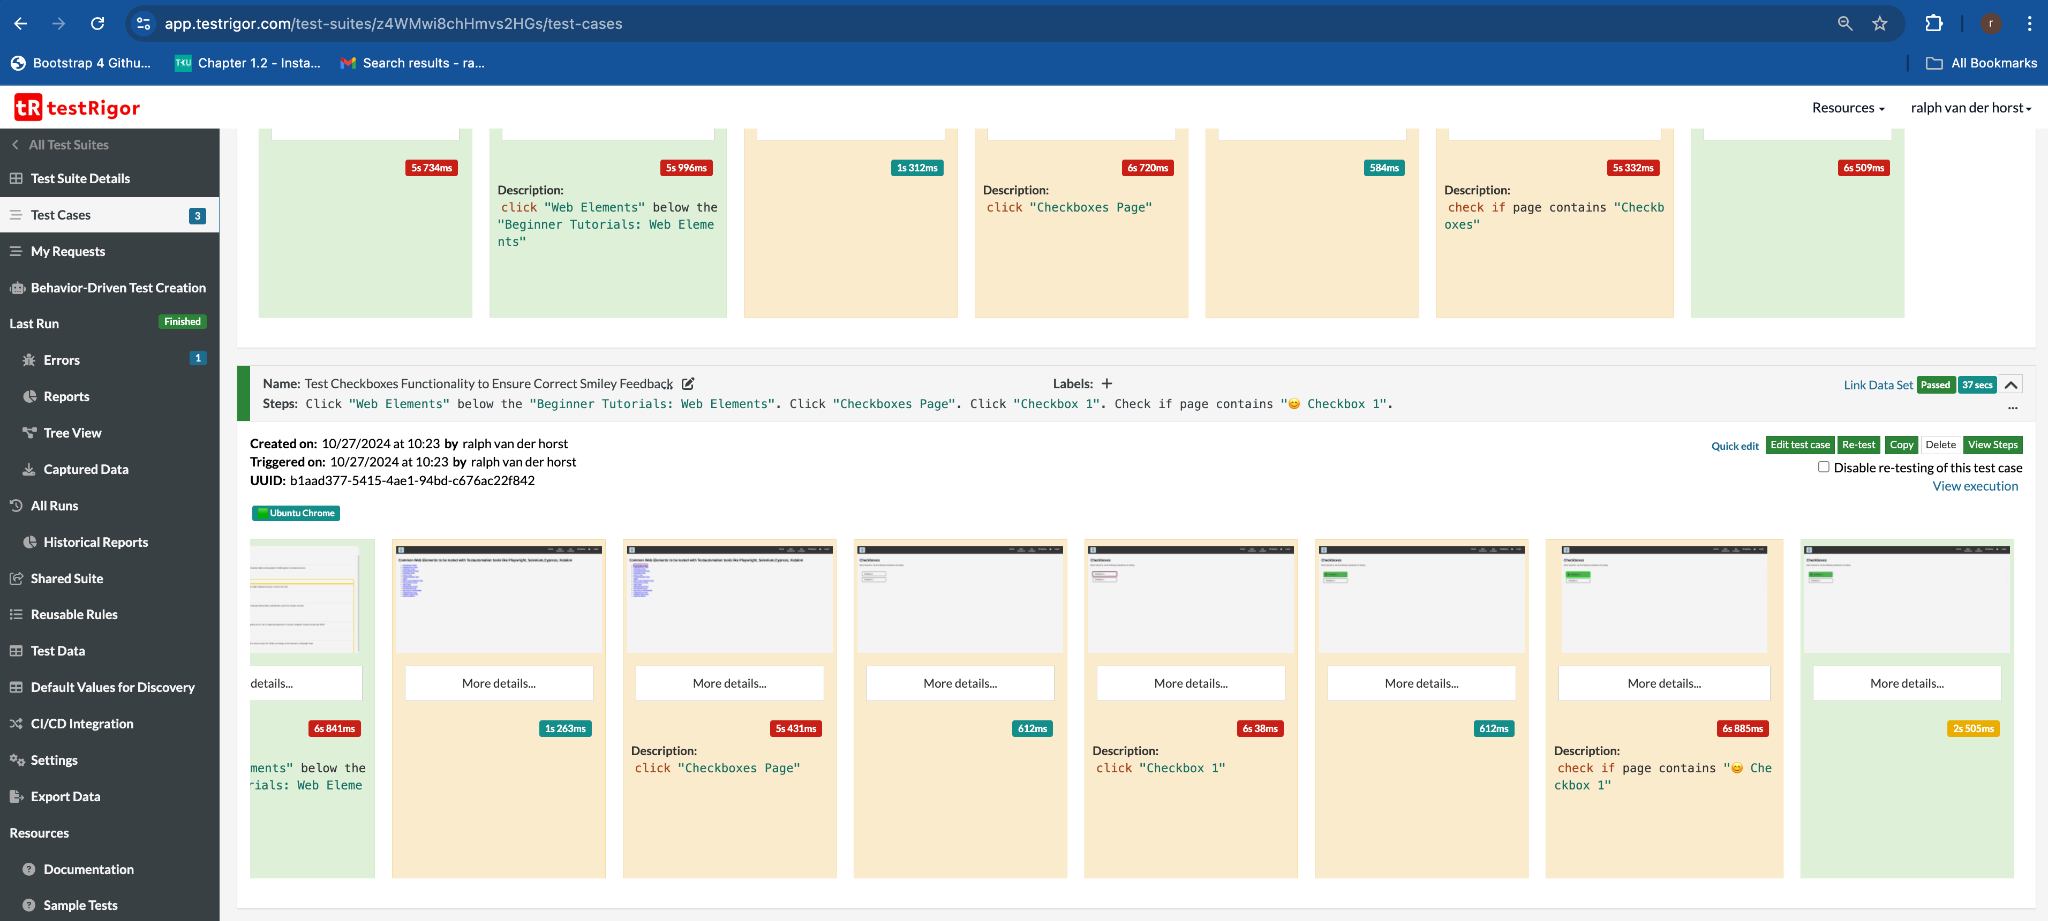
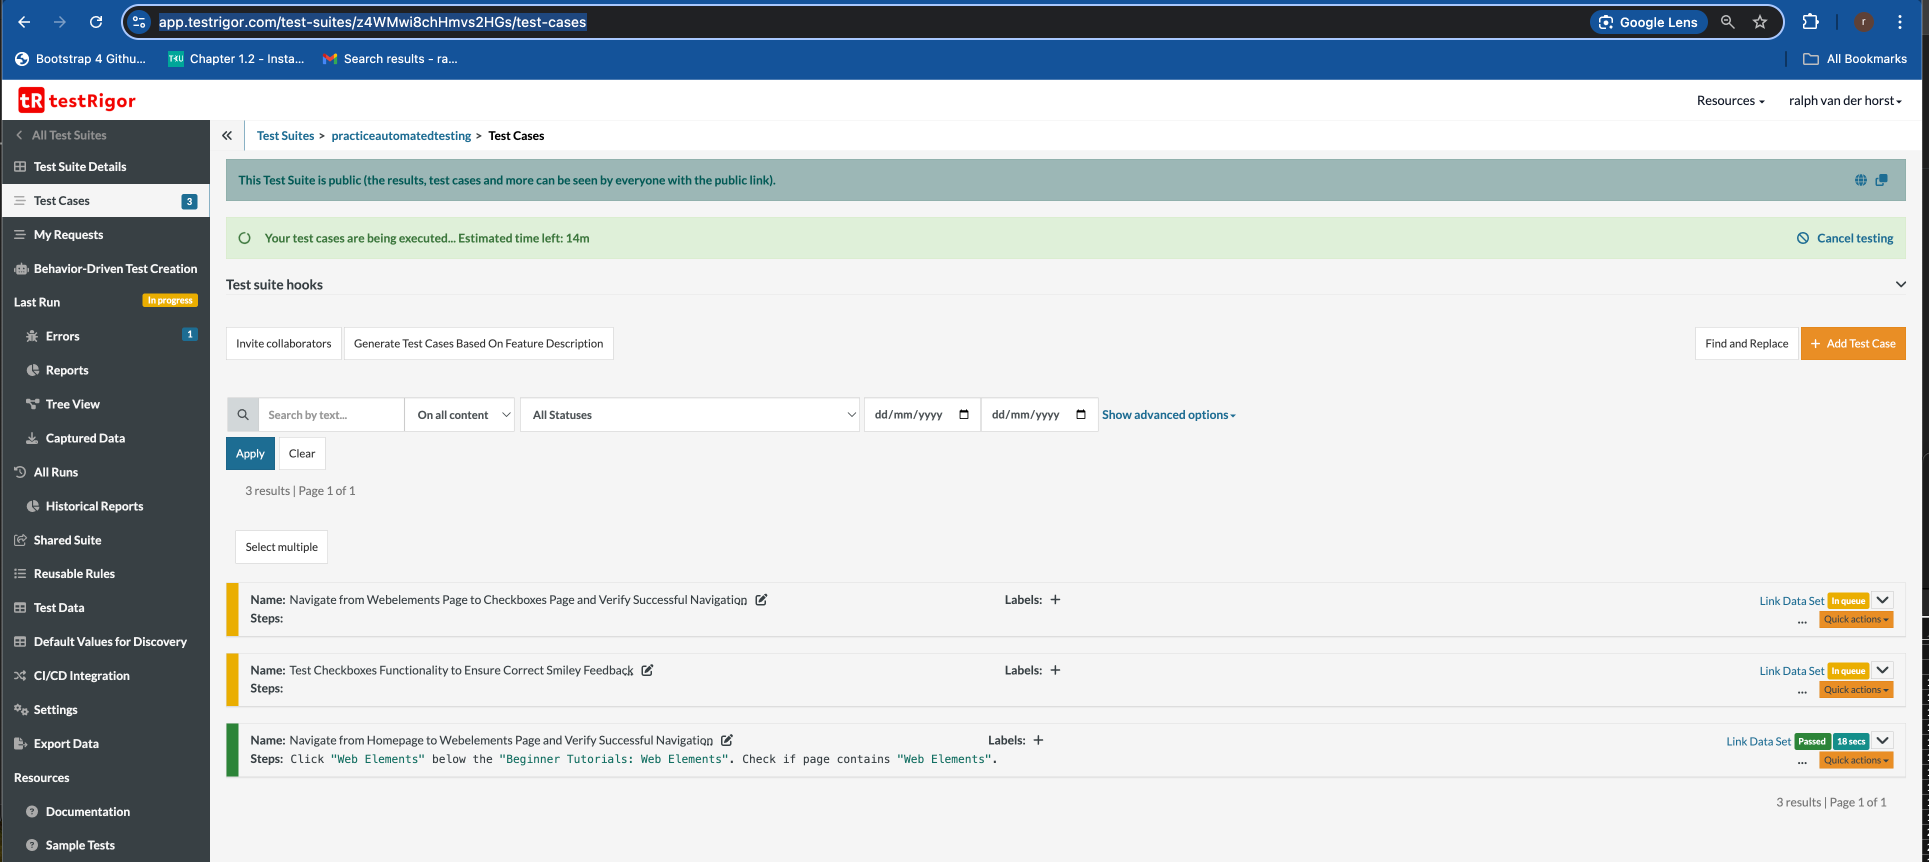
Navigating the TestRigor Dashboard to Edit Test Cases
Once your test suite is created in TestRigor, you will be directed to the Test Cases screen, which provides various options to manage and edit test cases within the suite.
Step 1: Accessing the Test Cases List
- In the Test Cases view, you’ll see a list of all the test cases within the selected test suite.
- Each test case is displayed with a Name and Steps section. Here, you can view and quickly identify the test flow.
Step 4: Create Test Suite
Step 2: Adding a New Test Case
- To create additional test cases, click the + Add Test Case button located at the top right of the list.
- Fill in the necessary details such as test case name and steps, then save to add it to your test suite.
Step 3: Editing Existing Test Cases
- To edit an existing test case, locate the test case in the list and click on the edit icon (pencil) beside its name.
- This will open the test case editor, where you can modify steps, add new assertions, or change the test flow as needed.
Step 4: Managing Labels
- Each test case has a Labels section, allowing you to add tags or categorize test cases. Click on Labels + to assign relevant labels for easy identification and filtering.
Step 5: Quick Actions and Test Status
- On the right side of each test case, you’ll find the Quick actions dropdown. This menu offers options for managing data sets, running individual tests, and viewing test results.
- Each test case displays its current status (e.g., In queue, Passed) along with the execution time (e.g., 18 secs).
Step 6: Searching and Filtering Test Cases
- The search bar allows you to search test cases by text, content type, or status. Use the dropdown menus to refine your search or apply advanced filters to locate specific test cases within the suite.
Step 7: Generating Test Cases Based on Feature Descriptions
- At the top of the dashboard, you’ll see a Generate Test Cases Based On Feature Description option. This feature uses AI to automatically generate test cases based on the description provided, helping you save time and ensuring comprehensive coverage.
Step 8: Viewing Test Execution Progress
- The green banner at the top indicates that your test cases are being executed, showing the estimated time left for completion.
- You can Cancel testing at any time if you need to make modifications or halt the current execution.
This dashboard view is essential for organizing and refining your test suite, enabling efficient test management and quick access to editing features.
concluded, a fantastic tool for non automation specialist to generate test. It provides